Managing your Collection
Want to update or edit your collection?
To access your collection's "Manage Collection" section, navigate to your Dashboard and select the collection you want to manage.
**A link to your dashboard page can also be found here.
Managing your Collection and posts
There are TWO levels of settings that you can manage within your collection.
The first is your overall collection. (This is where all your posts live)
The second is the individual posts / NFTs that you have uploaded.
1. Managing your Collection
Collection Overview
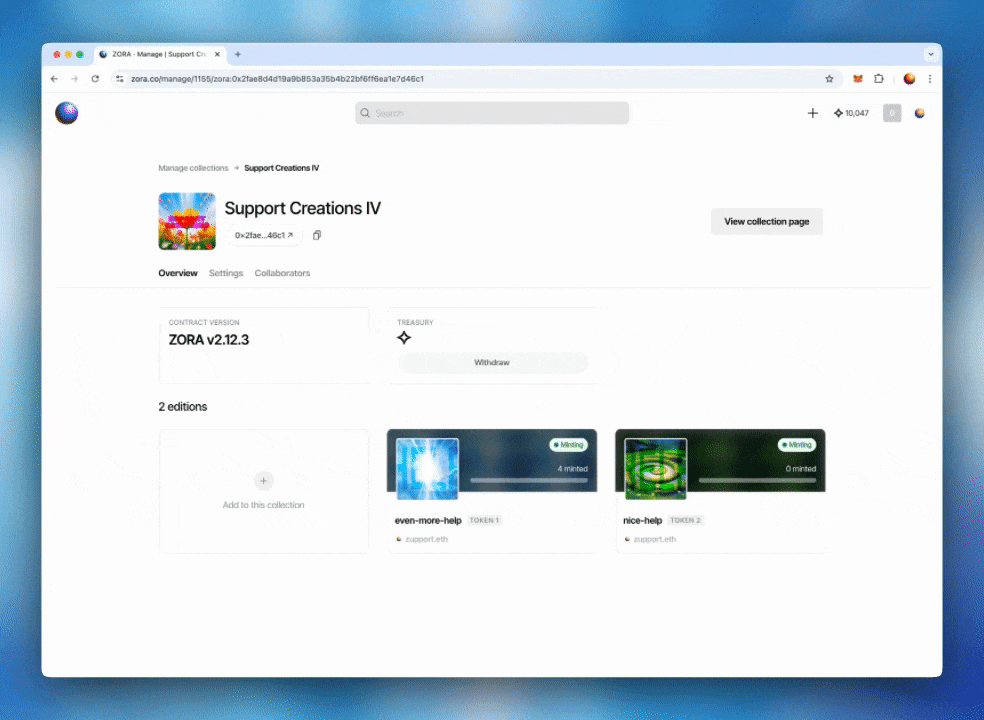
While viewing the overview page of your collection, you can view your current contract version number, treasury balance, all of the posts within your collection, and the option to "Add a new NFT to this collection".
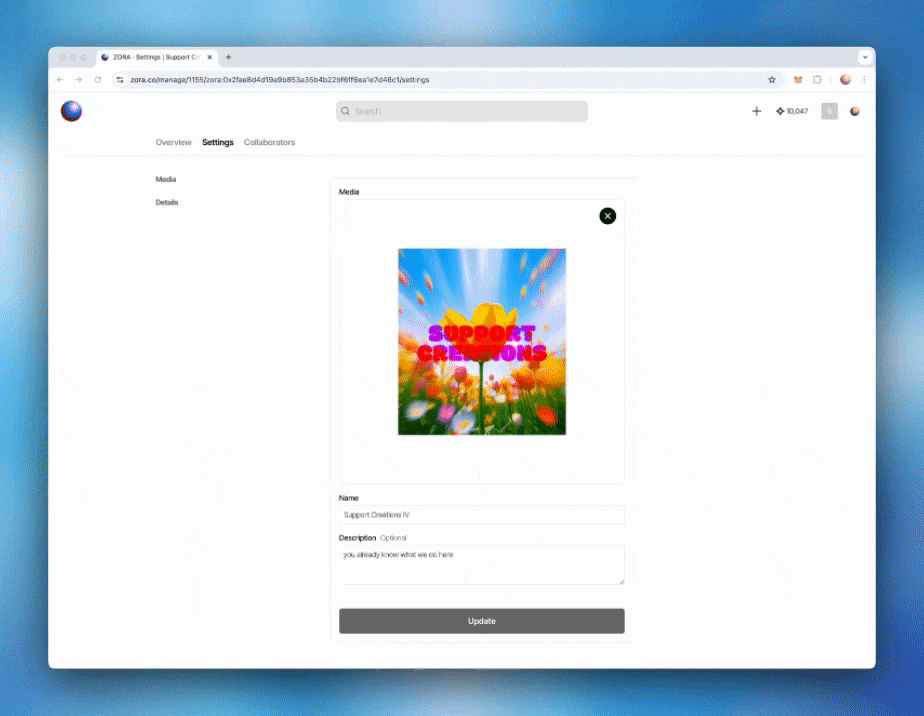
Manage your Collection Settings
To update your collection, navigate to the “Settings” tab. You can update your collection name, description, and thumbnail from here.
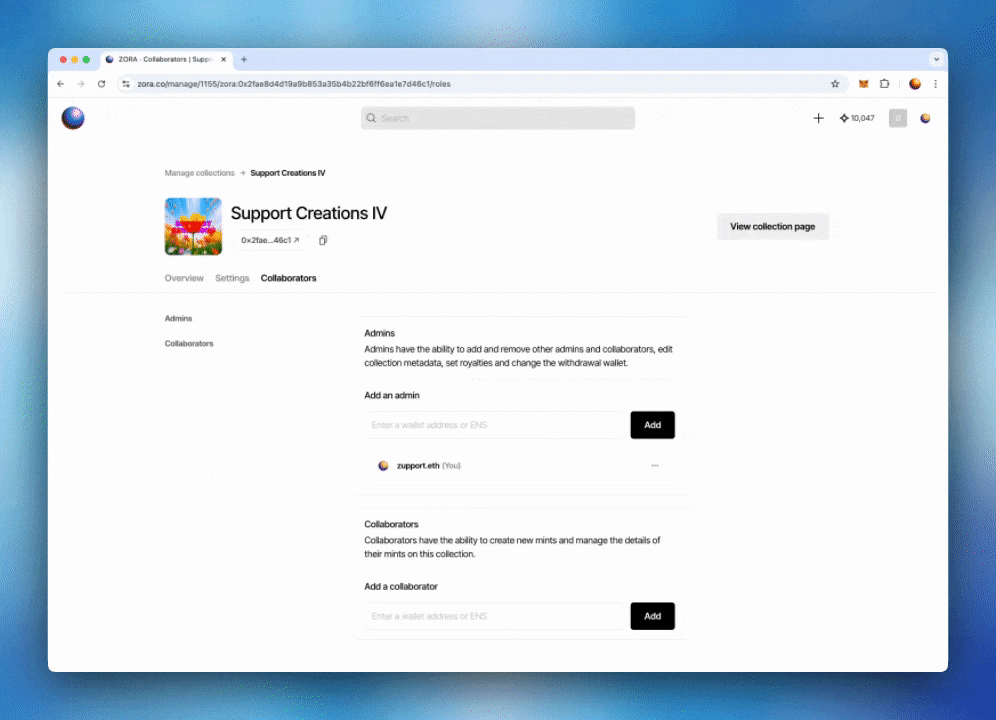
Add Collaborators to your collection
Viewing your collection dashboard, go to the Collaborators tab, enter the wallet you'd like to add as a Collaborator and click "Add".
To protect those collaborating on a collection, the role comes with the following permissions:
A collaborator can create posts.
A collaborator can edit and manage posts they have created.
A user with the collaborator role CANNOT do the following:
Add or remove other admins and collaborators.
Edit and manage posts created by others.
2. Managing your Post
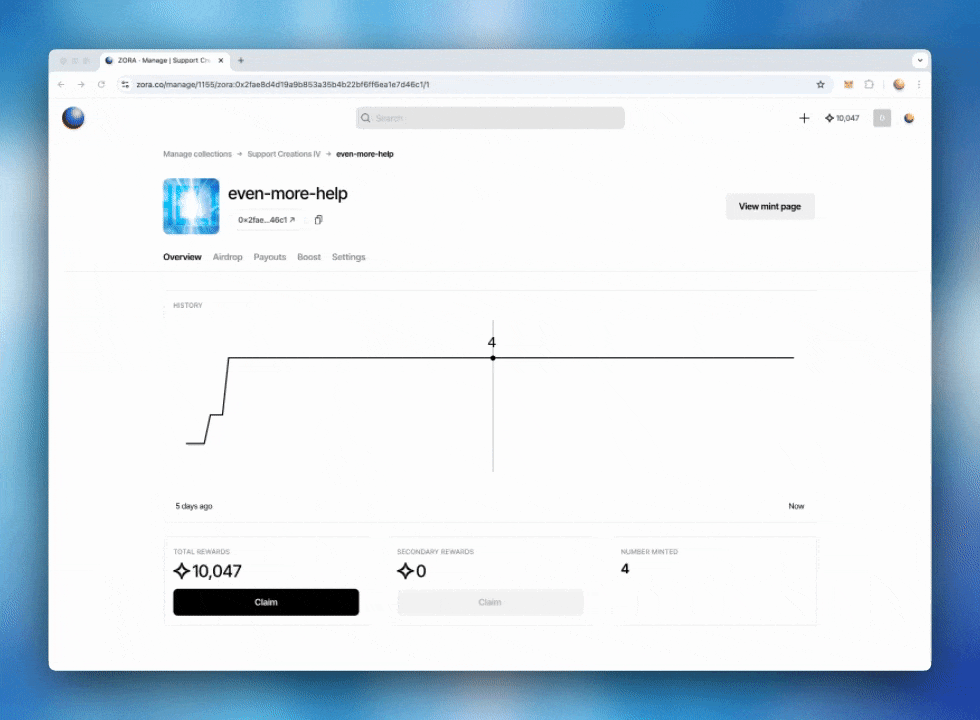
Post Overview
You can select the post from your collection overview page to update one of your posts within your 1155 collection. From here, you can view the number of tokens that have been minted, create an airdrop, configure your payout addresses and withdraw your rewards.
Manage your Airdrop

Go to the Airdrop section on the NFT Dashboard.
Write the wallet addresses you want to airdrop to, separating them with a comma (,) or a return. Click "Airdrop (x) NFT" and approve the transaction to complete the process.
If you'd like to start over, click Reset, and all the added wallets will be deleted.
Manage your Allowlist
**DISCLAIMER: The Allowlist feature is no longer available for new collections on Zora. This DOES NOT affect existing collections with Allowlists, they can still be managed.
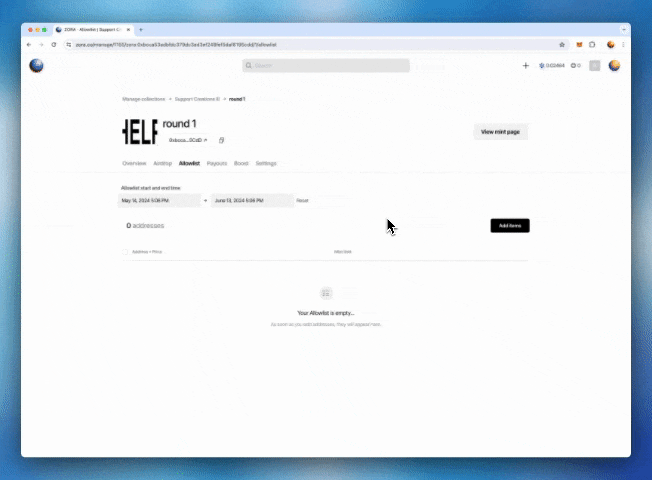
If you want to make a pre-sale or give different mint prices to specific wallets, you can create an Allowlist. To create an allowlist, you can follow our quick guide below
Go to the Allowlist section and select "Add Items".
You can choose between uploading a CSV file with all the names (check the example when clicking) or adding them manually, separating each wallet by a comma (,) or return.
Add the wallet addresses you'd like to add, the pricing, and the mint limit per address, and click on "Add items" to finalize your choices.
You can create multiple Allowlists with differing prices, mint limits, and addresses.
Manage Payout Settings
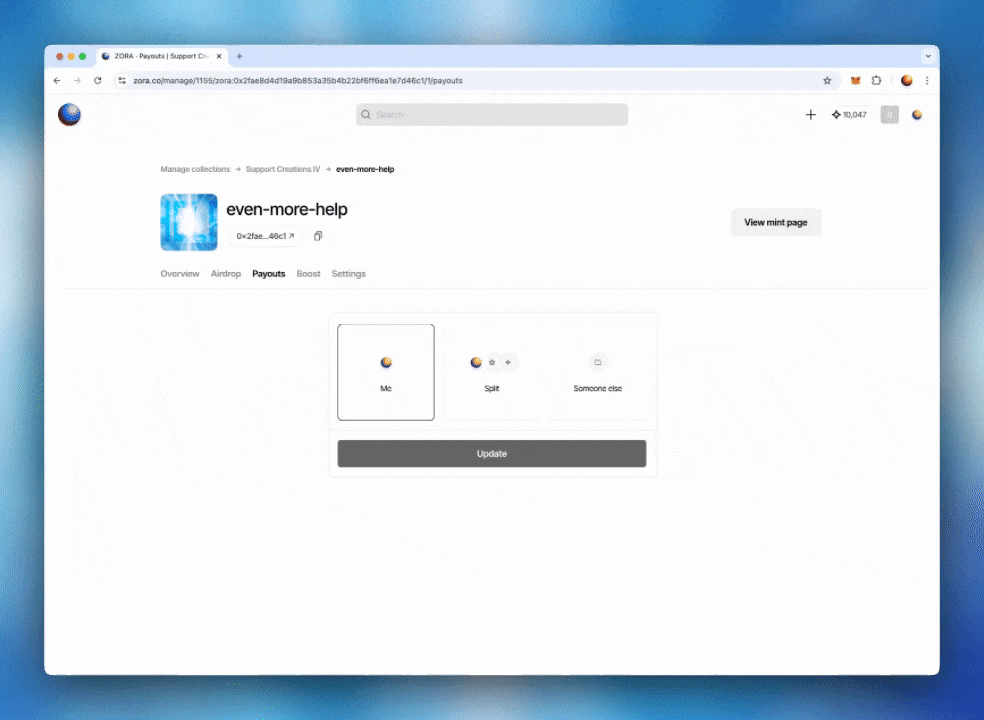
You can manage, change, and add your payout address(s) OR split payments to your collection in the payouts tab. These settings can be changed to create a collection that best suits your needs.
Your address (the address you create the collection with)
A Split address
** A maximum of 111 addresses can be added to one split contract.
Other Wallet is a single custom payout address.
Boost your post
Boosts offer a seamless way to share and distribute digital creations through a frame on Farcaster. Frames allow you to engage with your audience, making your digital content not only more accessible but also interactive. By prepaying for the gas, users can interact with your Boost frame and claim a free token that will be airdropped to them.
Learn more about the Boost feature here.
Manage your post Settings
Select the Settings tab to update your collection's metadata, including the post's name, description, attributes and artwork file.
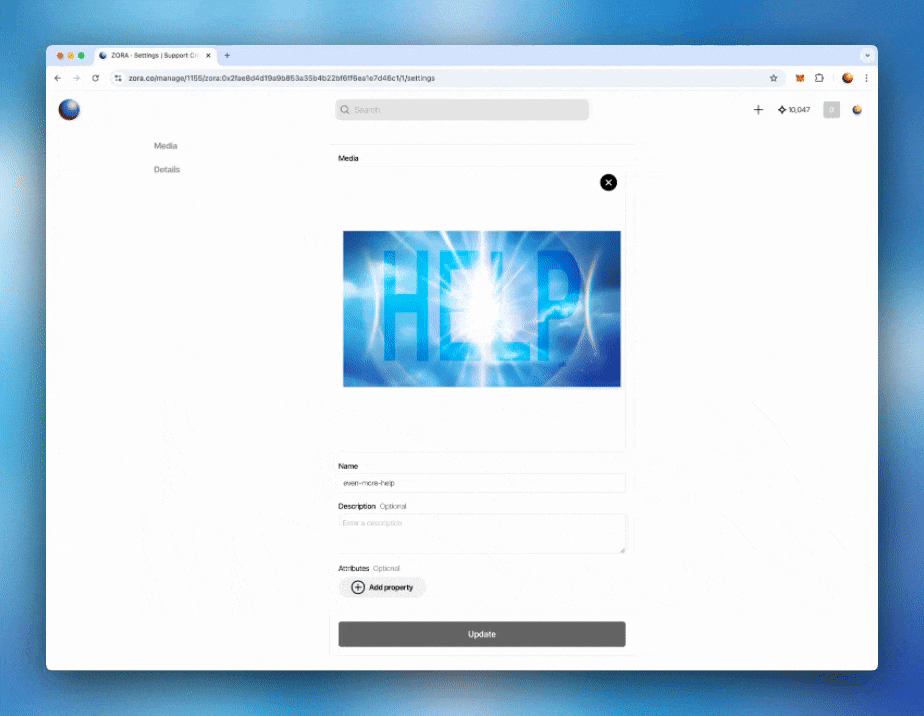
Once you are satisfied with the changes you have made:
Click “update”.
Approve the Gas fee: A message will appear within your connected wallet for you to approve the gas fee to complete the update of your collection. Gas fees are the cost of interacting with the Ethereum blockchain. Gas fees are not set or collected by ZORA.
Once the transaction has been confirmed, your changes/updates will be saved on-chain.
Need help or have some questions?
If you would like more help, don't hesitate to get in touch with our support team via our help centre or tag us on X (formerly Twitter) and Farcaster.