
Creating your account
If you’re starting with Zora for the first time, you can create your account through our mobile app or our website (zora.co). To start, you only need an email address. However, you can also connect any existing crypto wallet to your account.
Select one of the following options to learn more about creating your account on Zora:
Getting started on the Zora app
** Please remember if you already have a Zora account on our zora.co website, then you DO NOT need to sign up again. Please ensure you connect to the app using the same email linked to your account on our website.
1. Register your email
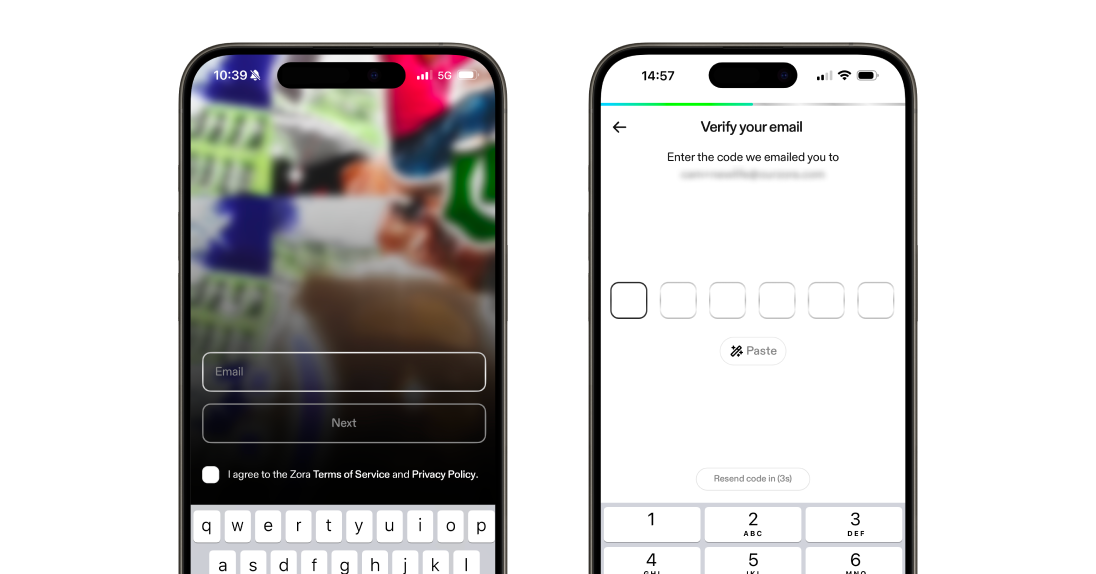
Open the Zora App on your device.
Tap “Log in / Sign up” on the welcome screen.
Enter your email address
Review the Zora Terms of Service and Privacy Policy, and then tap on the check box beside “I agree to the Zora Terms of Service and Privacy Policy” and tap “Next"
Check your inbox for a verification email, enter the six-digit two-factor authentication code in the text field, and tap “Next"
2. Add your profile details
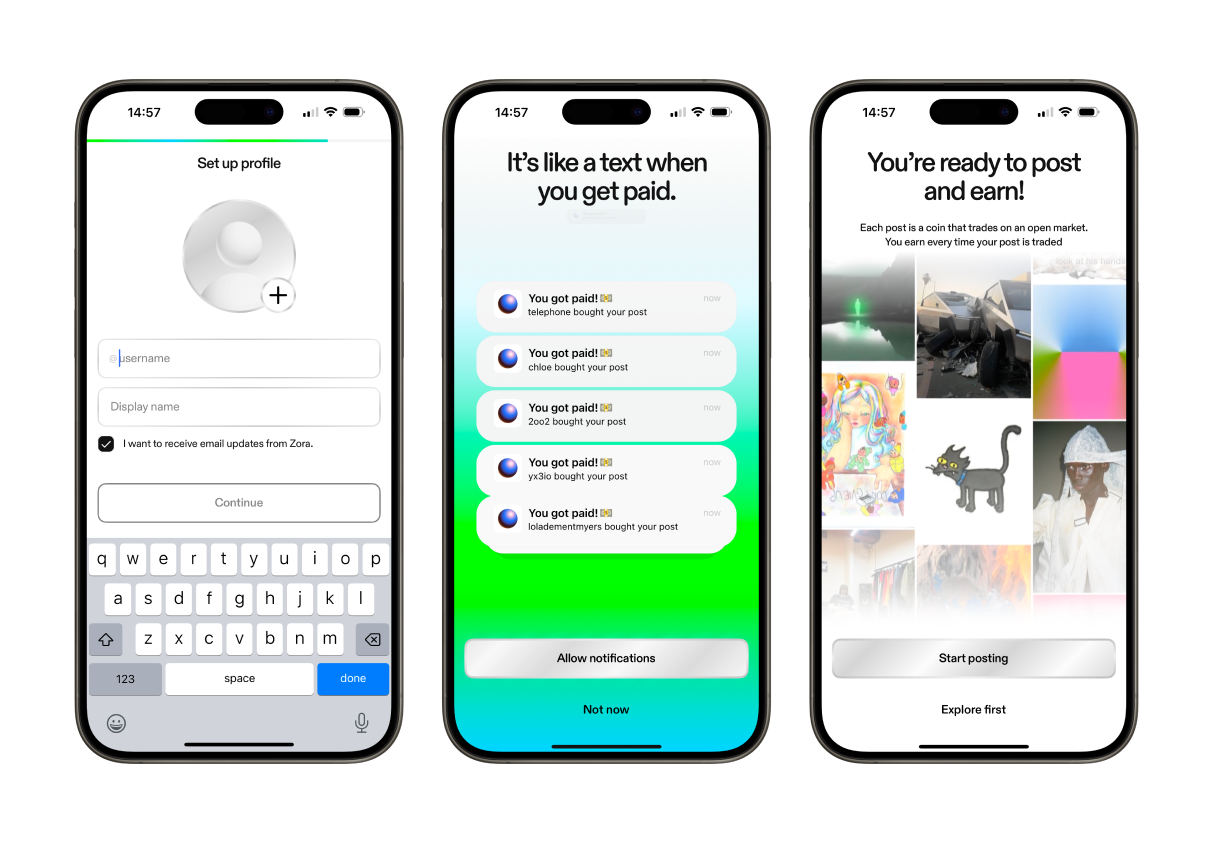
Create your username.
You can only use numbers, letters, and "_" in your username.
IMPORTANT: This will become your Creator Coin ticker if you choose to activate it, and it CANNOT be edited afterwards. (e.g. @jacob = $jacob)
Set your display name.
This can be anything and is what appears on your posts and profile.
Toggle your notification preferences.
3. Activate your Creator Coin **Optional
Navigate to your profile page.
Select "Activate your creator coin now"
Your creator coin is a tradable token tied to your Zora profile that represents you as a creator, your username becomes its ticker, and it can be bought and sold by others.
Press and hold the "Hold to Activate" button to deploy your creator coin.
IMPORTANT: This is an irreversible action, and your Creator Coin will be immediately tradable once it's activated.
Share your Creator Coin on your other social accounts or select "Close" to continue using Zora.
🎉 Your profile and wallet set-up is now complete! 🎉 You are ready to create, trade, and enjoy on Zora.
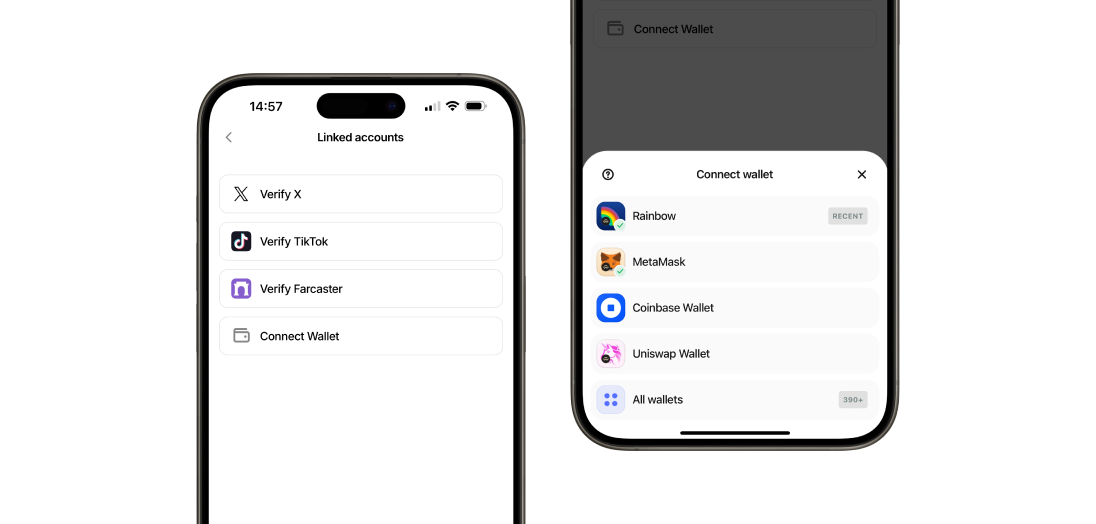
Additional Step: Link an existing wallet **Optional
Navigate to your profile page.
Open the settings menu in the top right-hand corner
Select the "Linked accounts" option
Tap "Connect Wallet"
Choose your wallet provider (Rainbow, Coinbase, MetaMask, etc.) and connect your existing wallet.
IMPORTANT: You CANNOT change the wallet address associated with your account, so please be careful which address you connect to.
Once you have signed the transaction in your wallet, your account will be linked to it.
Getting started on the Zora website
1a. Connect your existing wallet
ZORA currently supports wallets such as Metamask, Coinbase Wallet and any Wallet Connect-compatible wallet. Once your wallet is ready to connect, you can do this via the Zora homepage.
Click Connect at the upper right of the page.
Select "Connect Wallet".
You can choose your provider and follow the instructions in your wallet.
Your wallet will require you to "Sign" a signature request. This permits your wallet to connect to ZORA and secure your account. This step is similar to a password, as ZORA verifies you are the owner of the wallet you're connecting.
Continue by entering your profile details below.
1b. Create a wallet with your email
Get started on Zora easier than ever with a wallet created using only your email address. Wallets created on Zora are self-custodial, ensuring exclusive control without Zora or third-party interference—made easy with Privy. If you want to learn more about how these wallets on Zora work, you can learn more here.

Select “Login / Sign up”
Choose the "Continue with email" option to begin creating your Wallet.
** REMINDER: This option will create a NEW wallet address for your account, which cannot be changed.
Enter the email address you want to connect your wallet with and select "Submit".
Continue by entering your profile details below.
2. Complete your Profile
Enter and register your email address
Check your inbox for a verification email, enter the six-digit two-factor authentication code in the text field, and tap “Next"
Create your username
You can only use numbers, letters and "_" in your username
Add a bio for your profile **optional step
The character limit is 250
Connect your social accounts **optional step
Twitter
Instagram
TikTok
Farcaster
Finally, select "Finish"
Additional Step: Activate your Creator Coin **Optional
Navigate to your profile page.
Select "Activate"
Your creator coin is a tradable token tied to your Zora profile that represents you as a creator, your username becomes its ticker, and it can be bought and sold by others.
Click the "Activate" button to deploy your creator coin.
IMPORTANT: This is an irreversible action, and your Creator Coin will be immediately tradable once it's activated.
Share your Creator Coin on your other social accounts or select "Close" to continue using Zora.
🎉 Your profile and wallet set-up are now complete! 🎉 You are ready to create, trade and enjoy on Zora.
Need help or have some questions?
If you would like more help, don't hesitate to contact our support team via our help centre or tag us on X (formerly Twitter) and Farcaster.