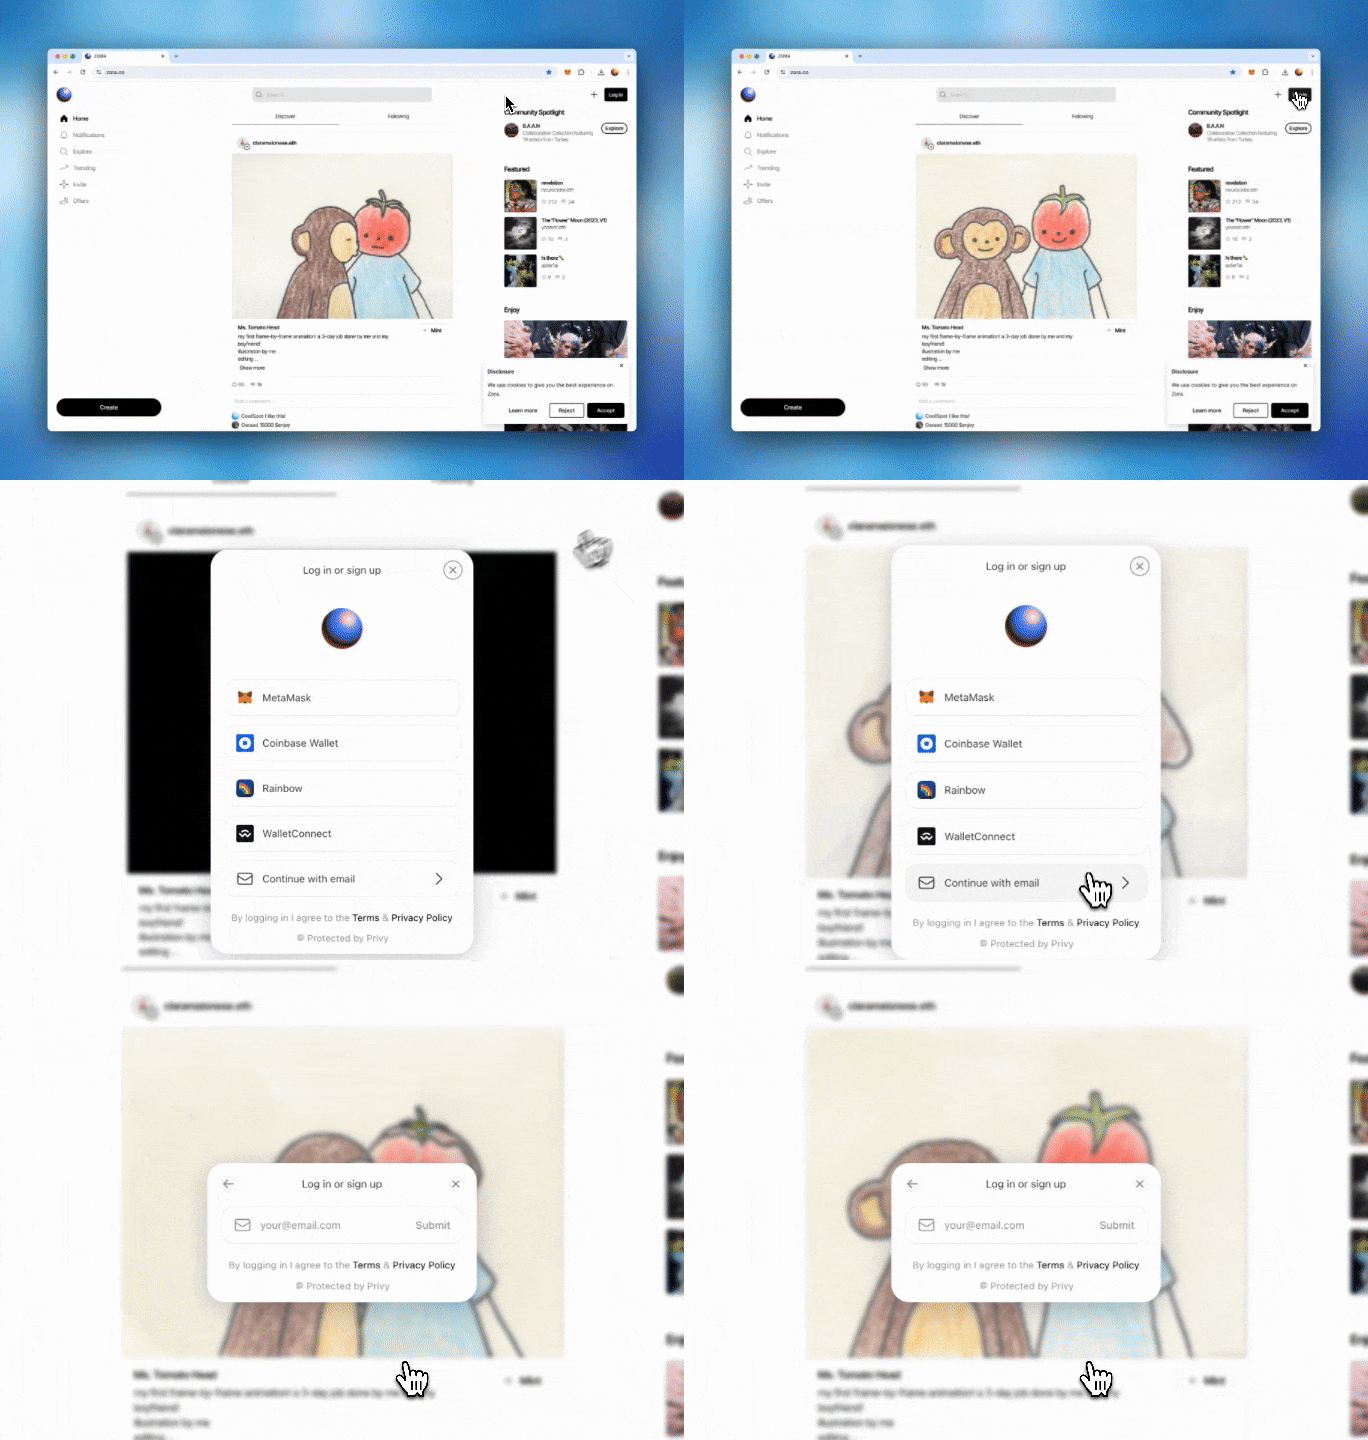
How do I create a wallet on Zora?
Get started on Zora easier than ever with a wallet created using only your email address. Wallets created on Zora are self-custodial, ensuring exclusive control without Zora or third-party interference—made easy with Privy. If you want to learn more about how these wallets on Zora work, you can learn more here.
To set up your wallet, you'll need to go through two simple stages:
1. Create your Wallet on Zora
Select “Login / Sign up”
Choose the "Continue with email" option to begin creating your Wallet.
** REMINDER: This option will create a NEW wallet address for your account, which cannot be changed.
Enter the email address you want to connect your wallet with and select "Submit".
**If you have an existing wallet and would like to connect with that, then select Connect Wallet and follow our separate guide here.
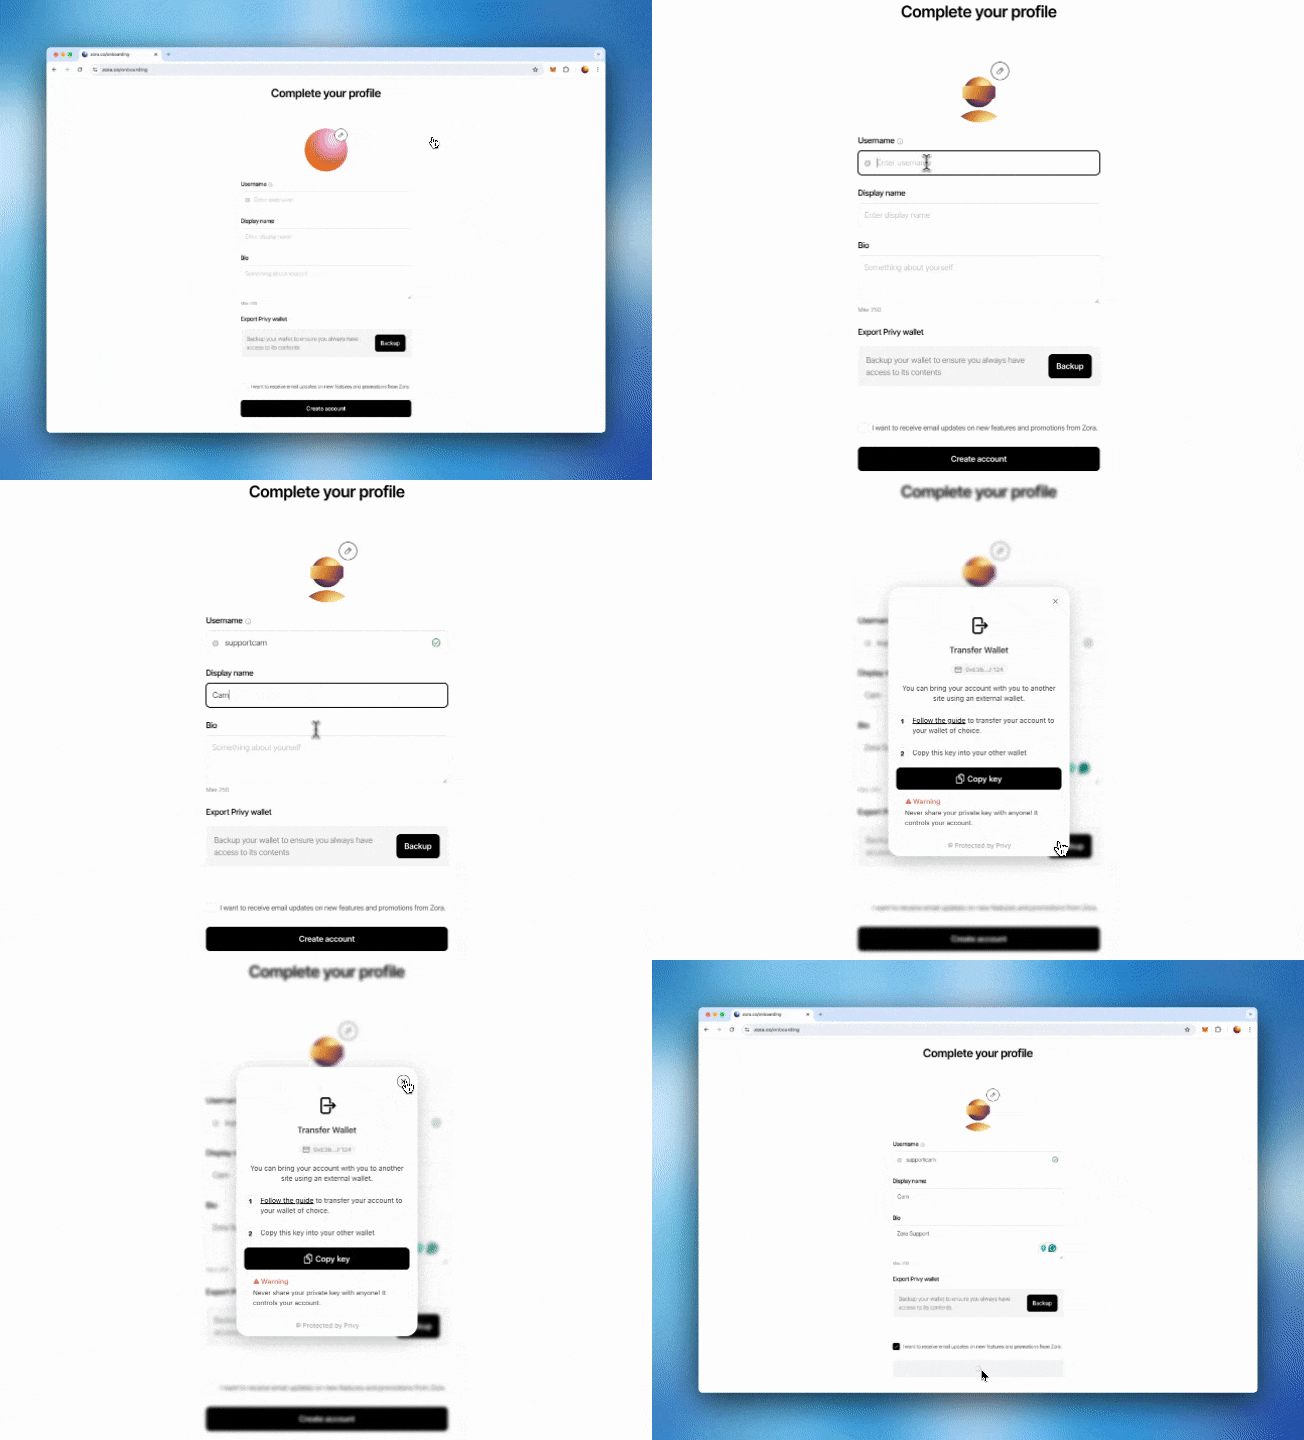
🎉 Your wallet on Zora has now been created! 🎉 After this, you will be directed to the "Complete your Profile" page, where you can finish the set-up process.
2. Complete your Profile
Finish setting up your profile by adding your details, backing up your wallet (not required, although recommended), and selecting your notification preferences. Continue with our guide below:
Add your profile picture.
**Please note that the file cannot exceed 2 MB.Choose your Zora username. This is a unique, personalized identifier you can choose to represent your profile.
Username requirements are:
Minimum 3 characters
Maximum 38 characters
No special characters, spaces or symbols
Enter your display name. It is purely aesthetic and can be anything from a pseudonym to your real name or even just the same as your username.
Add a bio to your page and tell us a bit about yourself.
**Max 250 character limit
Export your Privy wallet **(Highly Recommended)
Exporting your Privy wallet allows you to safely store and back up your wallet. To learn more about this process and why it's important, check out our guide here.
Toggle your notification settings.
**These can be changed and updated anytime in your profile settings.
Select "Finish"
🎉 Your profile and wallet are now complete! 🎉 Zora is ready for you to create, collect and enjoy. To learn how to create a collection on Zora, follow our guide here.
Need help or have some questions?
If you would like more help, don't hesitate to get in touch with our support team via our help centre or tag us on X (formerly Twitter) and Farcaster.


